

Table of Contents
MicroChip
A PicoFlex board connects physical sensors and relay outputs to a TetherBox. TetherX reads its two analogue inputs (AD1 and AD2, levels 0 to 1023), four digital inputs (IO1 through IO4, open or closed), and reported relay states. Map an input to a zone's camera to create an event with video context. The board's API tab contains Input Alerts and Microchip State.
Before you start
- Connect and power the board on a network reachable by the TetherBox. Connect a sensor to an input according to the board and sensor wiring instructions. Use a qualified installer for mains voltage, door hardware, and life-safety equipment.
- Add and activate the TetherBox at the site. The board must appear in Devices. Have a working camera in the zone you want to associate with each sensor; that camera must use the same TetherBox as the board. If the board is missing, see How TetherBox Detects Devices.
- Have a user with permission to configure network devices and a recipient account with access to the associated camera/site.
From installation to the first email
1. Open the board
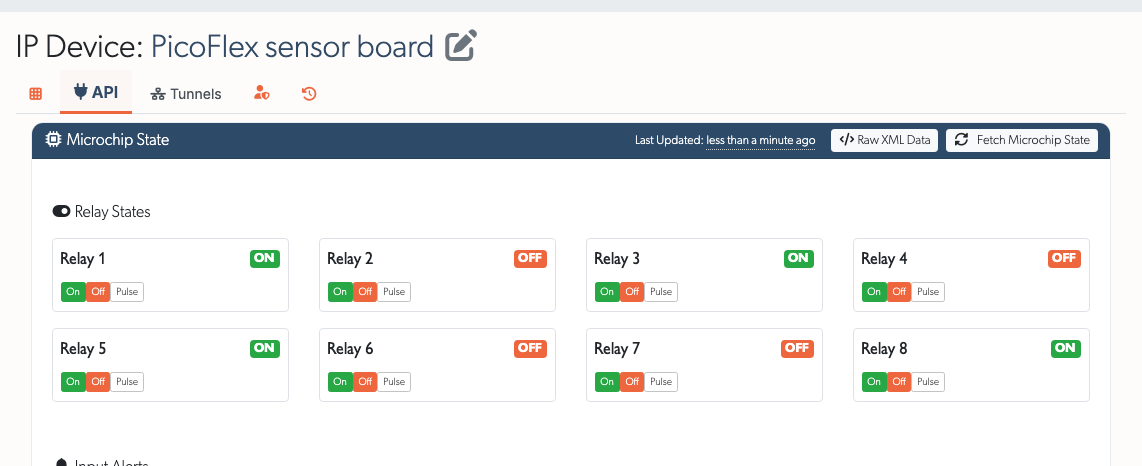
Go to Admin → Devices → select the PicoFlex or Microchip Technologies board → API tab. Click Fetch Microchip State to check its current readings.
2. Map the wired input
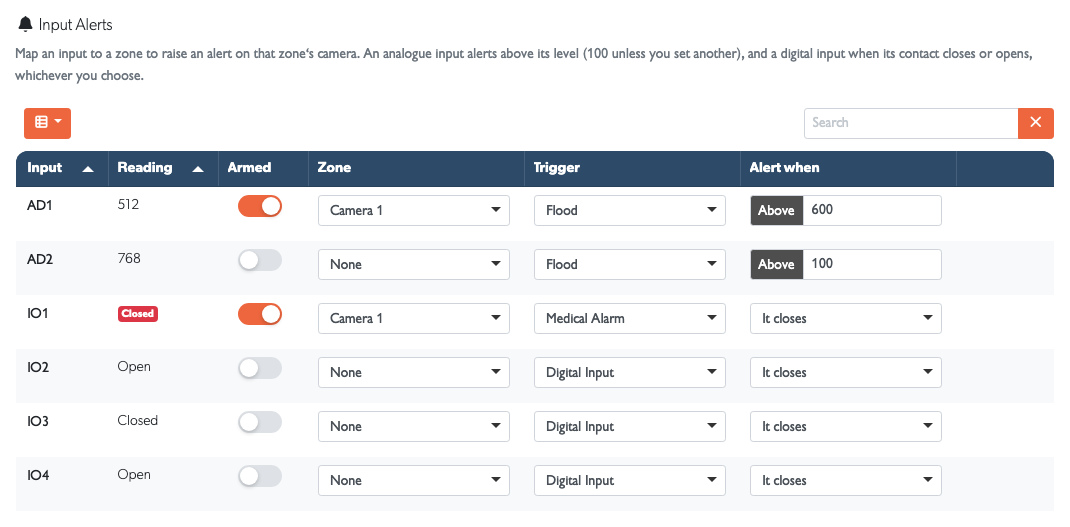
In Input Alerts, find the wired AD or IO row. Select the Zone containing the camera, choose the Trigger, and leave Armed on. Then set the condition for the input you use:
- Analogue (AD1 or AD2): Enter an Alert level from 0 to 1023. The input alerts when its reading goes above that level; the default is 100. For a flood sensor, choose Flood and set the level after checking its normal and activated readings.
- Digital (IO1 through IO4): Choose It closes for a normally open contact or It opens for a normally closed contact. The default is It closes. For a medical call button, choose Medical Alarm.
Click Apply on that row. The zone must have a camera on this TetherBox. If the form says custom code on the TetherBox drives the board, its mappings are read-only; contact TetherX Support to change that installation.
Tip: Flood, fire, gas, panic, duress and medical inputs notify even when the camera is disarmed. Other trigger types follow the camera's arming, site monitoring and Notify for these events settings. See Notifications.
3. Enable email for the recipient
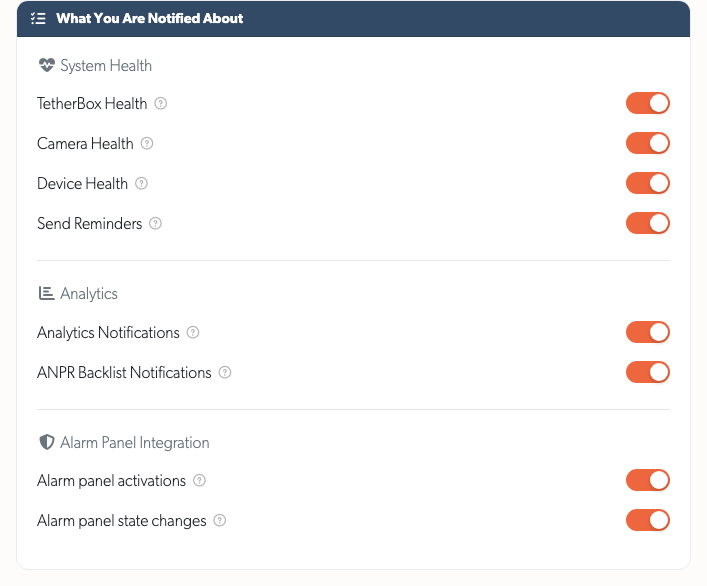
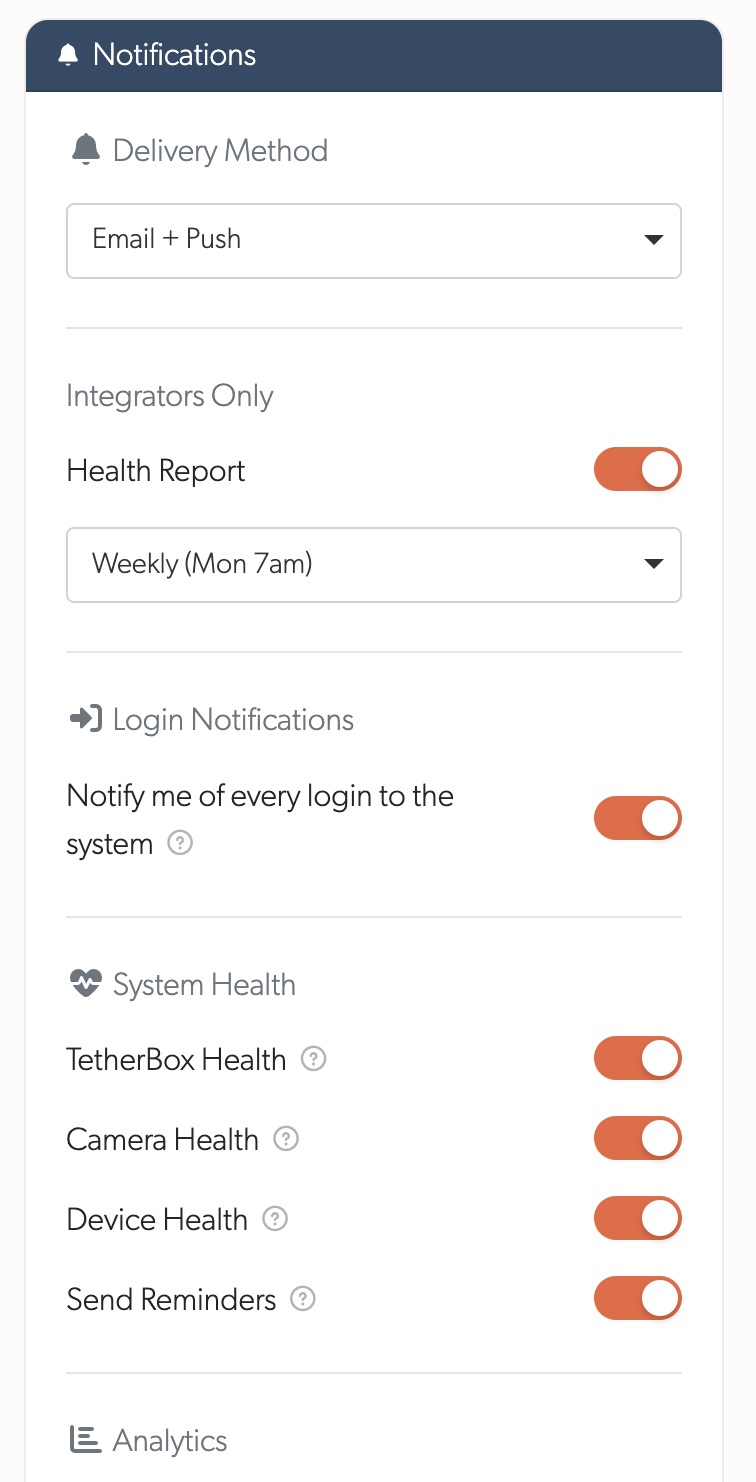
Open the recipient's profile → Notifications tab. Enable Analytics Notifications, set Delivery Method to Email Only or Email + Push, then click Update User. The recipient needs access to the associated camera/site. See Notifications for account types and delivery settings.
4. Trigger the sensor and check the email
Activate the sensor once. Click Fetch Microchip State again to confirm its reading changed. Check Events for an event at the mapped camera and check the recipient's inbox for the analytics email. The example below is a flood alert from an analogue input; a mapped digital input sends the same type of email with its chosen trigger. Camera snapshots appear when available.
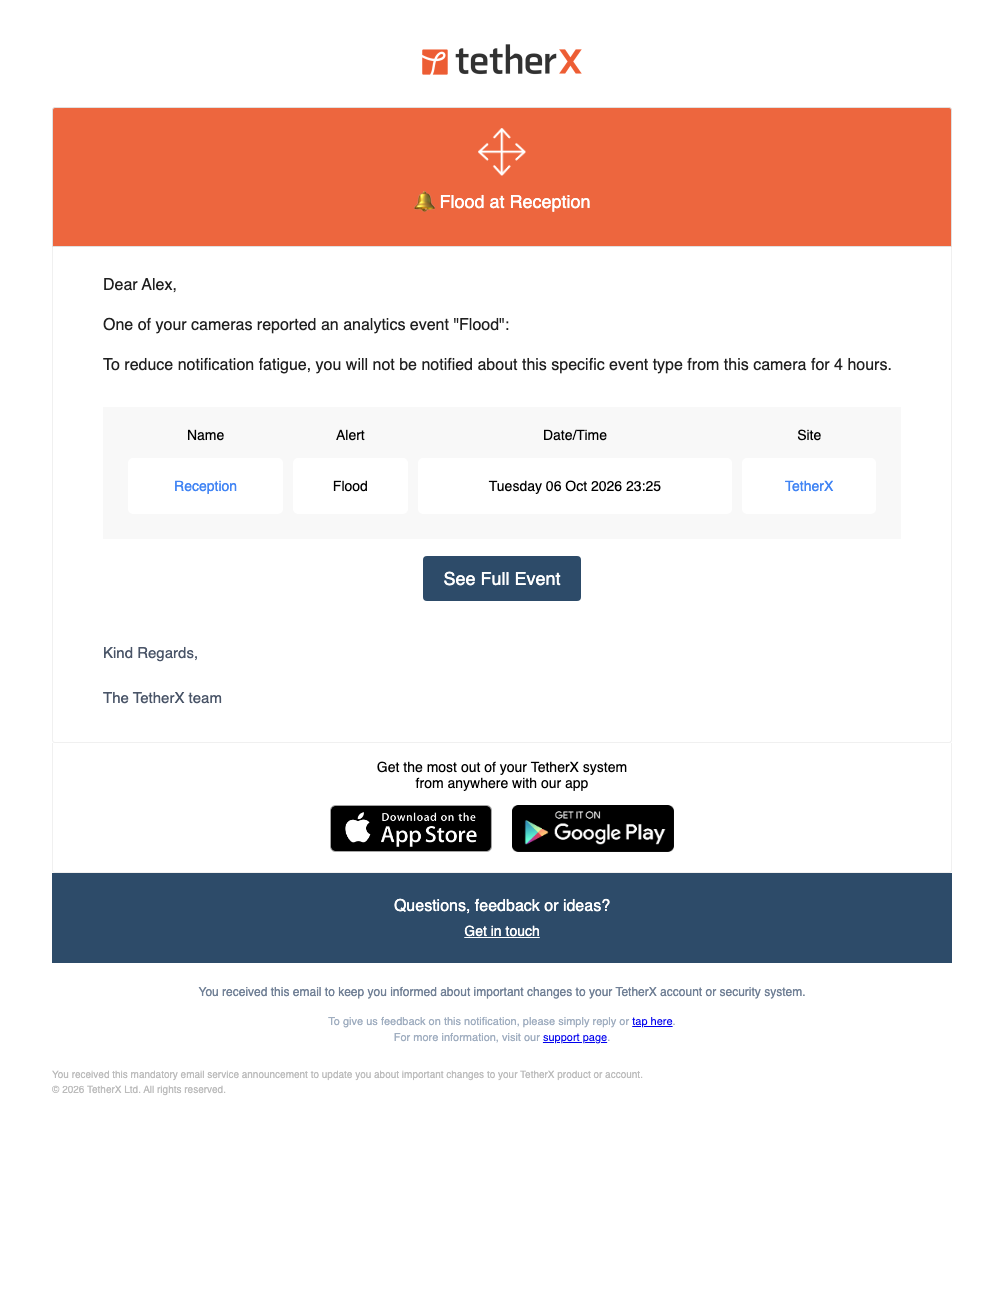
Use a fresh event when retesting: repeated alerts are throttled. If no email arrives, check the recipient's notification settings, spam folder and Rejected Emails.
Relay outputs
The Microchip State card displays the first eight relays and offers On, Off and Pulse (a three-second pulse) controls. Use Fetch Microchip State to refresh what the board reports. These controls switch board outputs; connecting a relay to equipment requires compatible wiring and an appropriate power supply. This screen does not configure automatic relay actions from events.
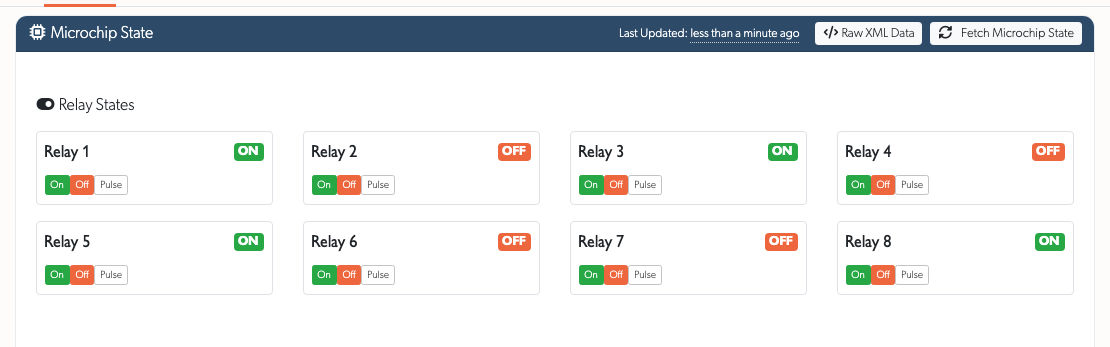
Common ways to connect a relay in a business or security installation include:
| Connected equipment | Example use |
|---|---|
| Siren, bell or strobe | Turn on a local warning device when an alarm needs an audible or visible response. |
| Door strike, magnetic lock or gate controller | Pulse a release input after an access controller authorises entry. |
| Elevator access controller | Enable a permitted floor through the lift controller's input, where that controller supports it. |
| Alarm panel | Pass a contact signal into a panel zone or other supported input so the panel handles the alarm. |
| NVR or video management system | Signal an alarm input so the recorder can start its own recording or mark the relevant footage. |
| Lighting or building management equipment | Switch a lighting, HVAC or plant control input, usually through a correctly rated contactor. |
| Remote equipment power control | Operate a suitable power controller to restart a device that needs a power cycle. |
These are wiring and integration examples. The connected equipment must support the signal, and its own rules determine what happens when the relay changes state. The Microchip State card provides manual relay control; it does not set up scheduled, event-driven or access-control automation.